

 {Template compliments of Willett Designs}
Showing posts with label Photography. Show all posts
Showing posts with label Photography. Show all posts
Sunday, February 14, 2010

Saturday, February 13, 2010
Photographic Textures
Yes, I took the following photos!
{top photo: rose outside the Globe Theatre at the Renaissance Faire}
(bottom photo: Atlantic City boardwalk}


I applied textures Aged Wood and Retro from Shadowhouse Creations. In both photographs I first applied the Aged Wood with hard light then applied the Retro as an overlay. I used this tutorial from Matt Nicolosi to apply textures using Photoshop Elements 7. I am loving textures!
Saturday, January 2, 2010
10 in 2010

Greetings from 2010! Did I mention that I love new year's resolutions? I love starting tabula rasa! I am going to challenge myself to do 10 in 2010. It might be a lofty goal. But not all my resolutions are that hard! If you are feeling inspired in the blogland please link me to your post of 10 in 2010!
10 in 2010
1. Streamline my work during work hours so I have more time to spend w/ Avery & Scott!
2. Sewing classes at Spool. Alicia and I are already signed up for the February market bag class. So excited! Ps It’s downtown on a Sat afternoon, perhaps we have no plans to go home right away?
3. Expand my photography using {AV} & manual settings; textures and black & white post processing.
4. Simplify life . . . always a work in progress.
5. Save for new home in . . . 2011-2012! I am actually attaching pictures of houses to my credit card so I am reminded each time I have to have that new pair of boots to replace the several I already have.
6. Recite the Serenity Prayer until it makes sense: God grant me the serentity to accept the things I cannot change, the courage to change the things I can and the wisdom to know the difference.
7. Paper crafts to a few new items.
8. Expand my cooking repertoire to include roasts & dutch ovens.
9. Tackle baking a layer cake {I usually do cupcakes}.
10. Did I mention increase my savings?? {that needed to be said twice}
2. Sewing classes at Spool. Alicia and I are already signed up for the February market bag class. So excited! Ps It’s downtown on a Sat afternoon, perhaps we have no plans to go home right away?
3. Expand my photography using {AV} & manual settings; textures and black & white post processing.
4. Simplify life . . . always a work in progress.
5. Save for new home in . . . 2011-2012! I am actually attaching pictures of houses to my credit card so I am reminded each time I have to have that new pair of boots to replace the several I already have.
6. Recite the Serenity Prayer until it makes sense: God grant me the serentity to accept the things I cannot change, the courage to change the things I can and the wisdom to know the difference.
7. Paper crafts to a few new items.
8. Expand my cooking repertoire to include roasts & dutch ovens.
9. Tackle baking a layer cake {I usually do cupcakes}.
10. Did I mention increase my savings?? {that needed to be said twice}
**The photo was done in AV w/ my 85mm 1.8 lens. The yummy waffles were made by my husband on his new wafflemaker! Avery & I love waffles!
Sunday, December 27, 2009
Post Christmas Post
I hope everyone had a very Merry Christmas! We did and it was super busy. I did not take a lot of photos. I er, we, were chasing Avery for most of the time so no one had time to grab the camera. I was able to get a few shots xmas eve; no she didn't want to sit or stay still for that matter. The saving grace was the new tripod I got. She seemed fascinated by the beeping light on the timer for morning photoshoot. The last photo is post processed with my new florabella vintage actions. I am still playing around with them! Avery is spending lots of time in her new kitchen! I will get around to getting pics of that soon! Also stay tuned for some fabulous pics of my brand new, adorable niece, Lyla Elizabeth. And then stick around for a year end recap and some thoughts for the new year!


Sunday, December 6, 2009
I'm dreaming of a White Christmas . . .
The first snowfall of the season! Avery was so excited and kept pointing outside and saying her version of "snow."


Tuesday, December 1, 2009
O Christmas Tree O Christmas Tree . . .
I was inspired by my post last year and by Elizabeth Kartchner's post on photographing your Christmas Tree to show the differences in camera settings and how you can make your tree "sparkle." Elizabeth's suggestion is to go as high as you can on the ISO and as low as you can on the aperture. I further suggest to anchor yourself against a wall if you do not have a tripod. Or at least use the poor man's tripod. I shot on the aperture setting {thanks Tracey} and here are the different looks to our tree - sans oraments. All but the 3rd were shot at 35mm.
 ISO 400; no aperture or speed adjustment

Auto
 ISO 400; no aperture or speed adjustment
 ISO 800; f/5.6; shutter speed 1/13.
 ISO 800; f/4.5; shutter speed 1/13
 The 3rd picture should have been a bit darker than the 4th picture (that was my original idea) but because I zoomed out my picture also captured a larger amount light bouncing off of the floors and walls. I was also closer to the window behind me. It just goes to show that natural light wins out everytime. For more information on this I highly recommend reading "Understanding Exposure" by Bryan Peterson (thanks Kristi). Love that book!!
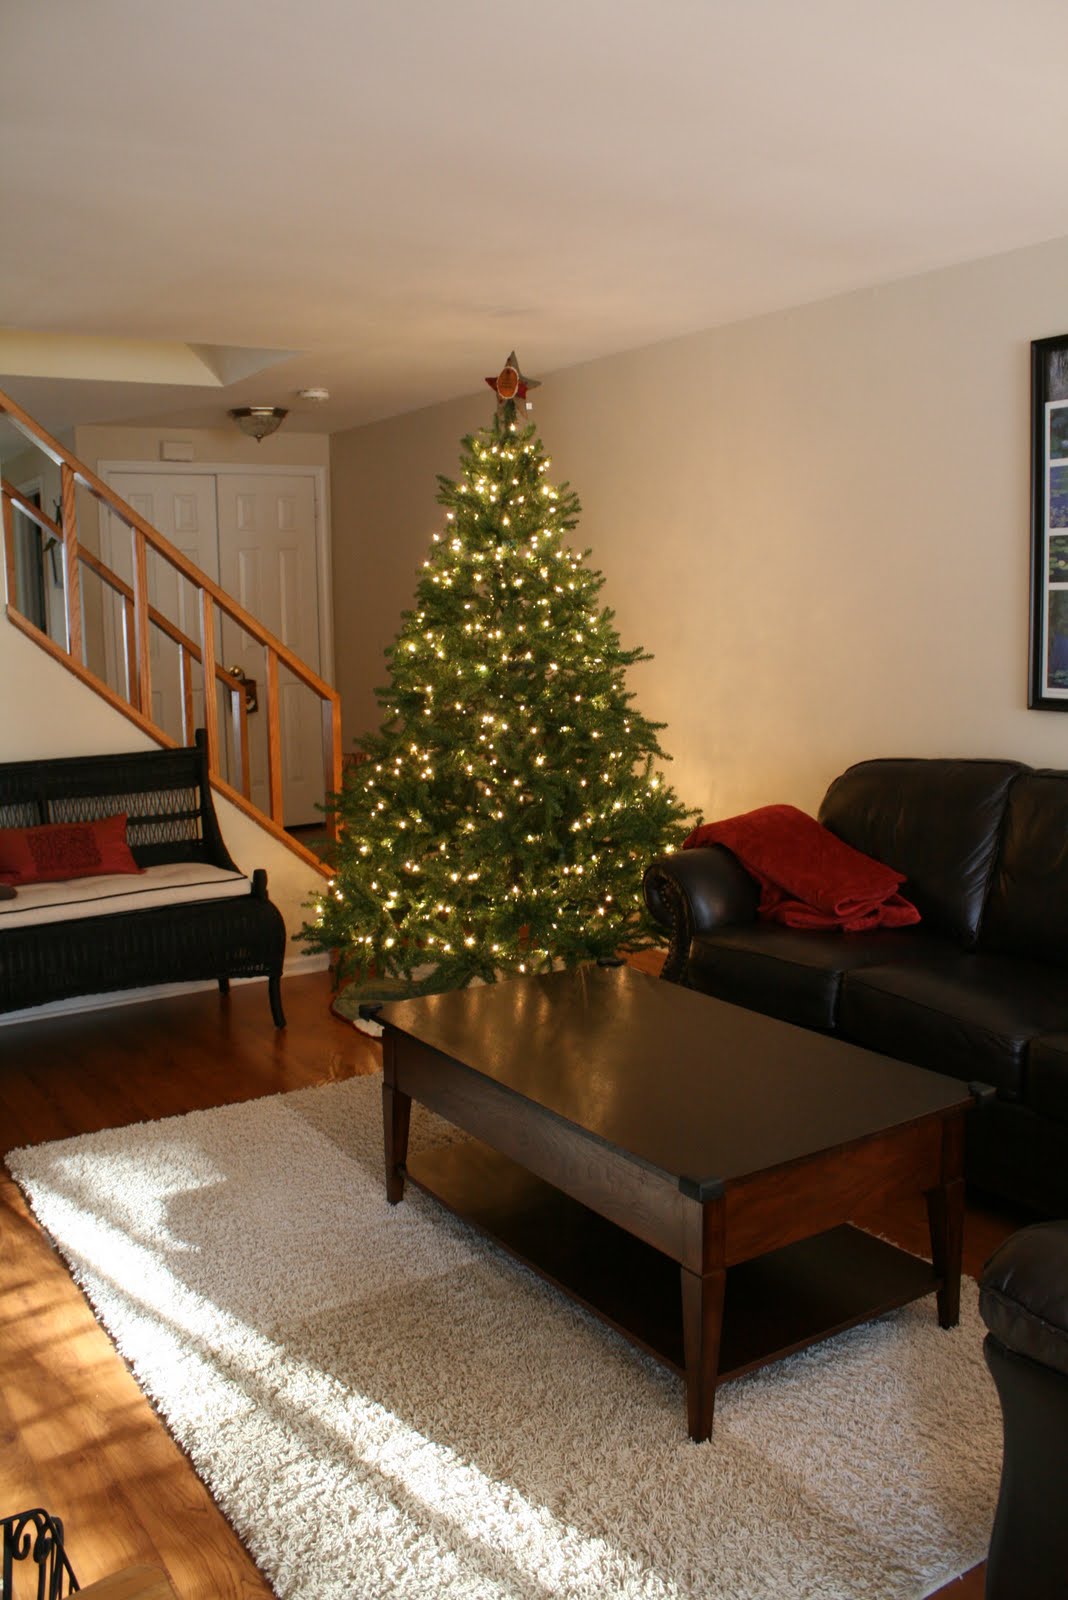 ISO 800; f/4.5; shutter speed 1/13
 The 3rd picture should have been a bit darker than the 4th picture (that was my original idea) but because I zoomed out my picture also captured a larger amount light bouncing off of the floors and walls. I was also closer to the window behind me. It just goes to show that natural light wins out everytime. For more information on this I highly recommend reading "Understanding Exposure" by Bryan Peterson (thanks Kristi). Love that book!!
Friday, August 14, 2009
Panoramic View

Ever since my photography class, I've been so excited to try out photomerge and panoramic view. I just haven't had too many opportunities to do so. The above pic is a photo merge from 4 photos to get a sweeping view of the scene. I had to take several to get the water just right but photoshop did a pretty good job! Overall post processing included an "overexposed" color pop. More about our trip later! PS click on the photo above for a more dramatic view!
Monday, August 3, 2009
Avery exposed
To continue practicing my photography, we got Avery out running along the sidewalk. She was happy to do so (if you have been following my latest facebook info). I've been practicing the rule of 3rds quite a bit, trying for new angles. It does get harder during the recent mobile phase, as others have warned me. Okay, we are getting ready to go on our first trip away sans Avery. Nervous but excited!! Ofcourse this whole week has been Avery focused - today it's the library and pool. And ofcourse I am taking her to the beach for a whole week later in August. So she'll be in heaven since she LOVES the beach. Stay tuned for some pics of baby Owen, pics of our trip and more stuff!


Just because I love the close up so much I did a different post processing! Love it!


Wednesday, July 29, 2009
Beautiful summer day!
We took some photos of Avery's friend Jack last week. She took charge of the cheerios while I took charge of the camera. The colors and scenery in their yard couldn't have been more spectacular! All the wood w/ the greenery made for a fantastic background! Oh and being photogenic helps too! We were able to sneak in a couple of rounds of baseball. Thanks Jack for being such a trooper!


Thursday, July 2, 2009
Vignette style
I love coffeeteaphotography for all their helpful & FREE tutorials & actions for both Photoshop and Photoshop elements. I just tried out Rita's new tip on creating a vignette or burn effect. Go to her website here (and bookmark it for sure) and follow the directions. See my sample below!

 Church photographed in Cape May, NJ w/ 85mm 1.8 lens.

 Church photographed in Cape May, NJ w/ 85mm 1.8 lens.
Monday, June 15, 2009
A rose by any other name . . .
 85 mm 1.8 prime lens
color pop post processing
rose from my outdoor garden
Sunday, June 7, 2009
Belmont & the Burger

So I got a new camera lens a few weeks ago but I've been so busy it's been hard to find time to try it out! But here is a pic using the 85mm f/1.8 prime lens. It's super sharp and creats a really nice bokeh at close range. Scott and I love watching the Kentucky Derby, Preakness & Belmont so we thought we'd have a date when Avery went to bed. It's a modified recipe from Rachel Ray: Sage burgers. I use the sage from my herb garden - chopped and add some chopped shallot (my new cooking friend) to the ground beef. Make yours at least 85% lean if you can - it really does make a difference. Just don't eat a burger every day! Don't forget to add some olive oil as well. To top it off we added chedder cheese & oatmeal buns. Note that's a gin & tonic in the background!
Saturday, April 18, 2009
Cherry Blossoms
We had an incredibly blue sky the other day and I couldn't resist bringing my camera on a walk and snapping some cherry blossoms. I put the text at 50% so it had a cloudy look to it! I'm working on a wordpress photosite to permanently display my photos in pages. I'll keep you posted when it's officially up & running!


Monday, April 6, 2009
A little spring fling!
 I adjusted the color of the background so you could see the layout better. I used Rita's {coffeeteaphotography} new storyboard for this! You can click on the picture to enlarge! Happy Spring!
Sunday, March 29, 2009
Smile! {click}

I just finished what turned out to be a fabulous 5 week photography course at the Mainline Night School. The instructor was Jack Ansley from John H. Ansley Studio, Devon, Pa. The first evening of "getting to know your camera" was more of a review for me but by the 3rd session I had well invested my time and money's worth! We had 3 assignments including my favorite one on the Rules of Composition which is featured in my photograph above. Jack printed our photographs from his studio printer and we learned how to mount it on matboard. Since the winter weather prevented many of us from shooting landscape photography we could choose an already exposed photo. This photo is taken from my 2001 trip to Paris in the gardens at the Rodin Musee. If you are looking for an all-around photography course consider Ansley Studio! For further classwork, Jack suggested joining a local camera club to see other's special interests. Happy snapping!
Friday, February 20, 2009
"Poor Man's Tripod"
Thought I'd hand out a free tip that virtually costs nothing! I love to take pics at Longwood but really can't cart a tripod around {unless I go by myself ~ but why would I do that?}. So my cousin Jake {see below} gave me a fantastic tip for a DIY tripod that takes up no space and provides stability on one of the camera's axis:
Supplies: string, screw & washer.
 Use a 1/4-20 (1/4" diameter, 20 threads per inch) machine screw that will fit into the bottom of your camera. You should be able to find this at any hardware store. Attach a string to it the length of your eye to the ground.

 When you need to use it, screw it in and step on the washer and pull the line taught.

Thanks Jake!
Supplies: string, screw & washer.
 Use a 1/4-20 (1/4" diameter, 20 threads per inch) machine screw that will fit into the bottom of your camera. You should be able to find this at any hardware store. Attach a string to it the length of your eye to the ground.
Tie a large washer or other weight to the other end.
 When you need to use it, screw it in and step on the washer and pull the line taught.
Thanks Jake!
Tuesday, February 3, 2009
DIY Color Pop
I found this Color Pop tutorial on a flicker group. I haven't been able to figure out who to give credit to so if you know - give me some friendly flutter! Here it is:
1. Duplicate your background layer (ctrl-j).
2. Go to Filter - - Other - - High Pass. Give it a radius between 20 and 40.
3. Invert it (control-i).
4. Change the Blending Mode to Color Dodge. Reduce the Opacity to about 50%. Merge Down. * This is found on the right side of your screen (PSE 7.0 users) under "layers."
5. Maybe up the Saturation to taste (5 is good).
6. Adjust your Levels. Go to Enhance section.
7. Sharpen with your preferred method (unsharp mask, high pass, etc)


I think you have the find the right pics for this process. Not all colors pop out! Some colors you just don't want to pop out either!! Good Luck & Have fun!!!
1. Duplicate your background layer (ctrl-j).
2. Go to Filter - - Other - - High Pass. Give it a radius between 20 and 40.
3. Invert it (control-i).
4. Change the Blending Mode to Color Dodge. Reduce the Opacity to about 50%. Merge Down. * This is found on the right side of your screen (PSE 7.0 users) under "layers."
5. Maybe up the Saturation to taste (5 is good).
6. Adjust your Levels. Go to Enhance section.
7. Sharpen with your preferred method (unsharp mask, high pass, etc)
Here is my before pic (summer 2007 NYC):

Here is my after pic:

I think you have the find the right pics for this process. Not all colors pop out! Some colors you just don't want to pop out either!! Good Luck & Have fun!!!
Sunday, December 28, 2008
Merry Christmas!

Merry Christmas! Hope everyone had a splendid Holiday! I wanted to post a picture of our tree on Christmas Eve. I found this great tip for capturing the holidays lights on your tree on Elizabeth's "Just Us" blog Here. She suggests turning your ISO as high as it will go and adjusting your apeture as low as it will go and make sure you hold the camera still. For our shots we set the ISO at 800 and the speed at 1/13. (I forgot to check the aperture). PS She too has an Avery!!!
Wednesday, November 26, 2008

Saturday, April 26, 2008
Week 28


Here are some week 28 belly shots! Whew - it feels good to be in the 3rd trimester and in the home stretch!! The baby seems to prefer Miss Viv, the giraffe (a recent gift from Scott on his out of town travels). She gets a "kick" out of it every time we put the giraffe on my belly. A note about the shots: we used our new DSLR Canon Rebel XTi w/ f/1 50mm lens. Only one word to describe it: Awesome!! Happy Spring!!
Subscribe to:
Posts (Atom)
